
Step 1 · Narrative configuration
What the video is, and who it is for.
The intent matters more than its size on the screen suggests. It steers what the system pulls out of
your material and what it leaves behind. “Introduce our new analytics module to existing customers
and get them to book a demo” produces a different video from “explain what the analytics module
does”.
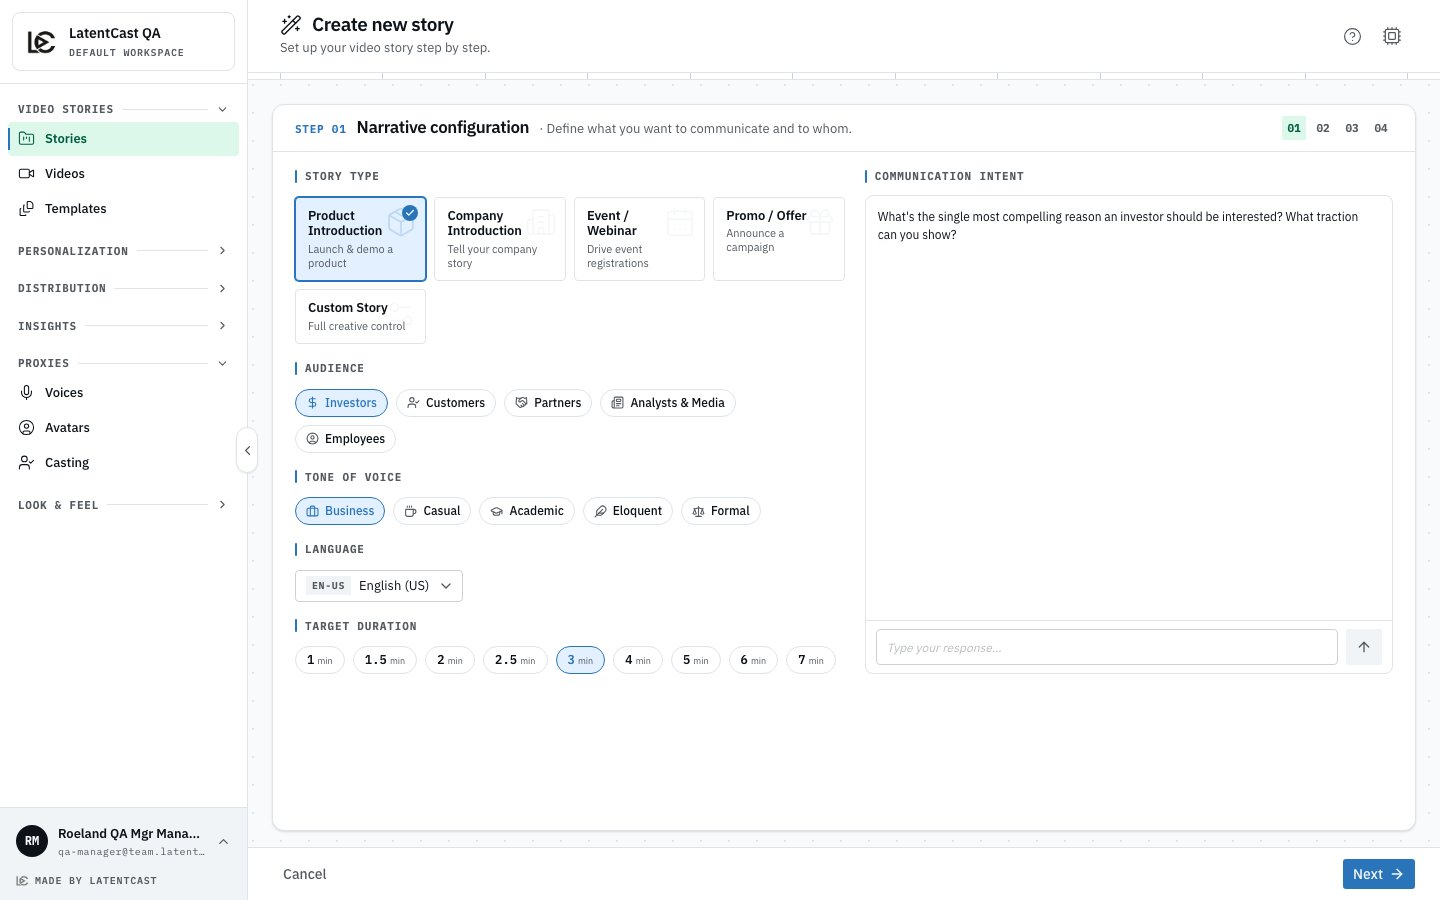
Step 1: what kind of story, for whom, in which language and tone, how long, and what it should achieve.
The language is settled here
A story is written and spoken in one , and the choice is fixed once the script exists — after that the wizard shows it locked. So decide it now rather than later. Everything downstream follows from it: the narration, the on-screen text, the tuning chat, the personalized videos made from this story, and the page each recipient watches on. Where you can, upload material in the same language; a Dutch story written from Dutch source documents uses the words your own documents use. One thing to check before you produce: the presenter needs a voice that covers the language. See Your voice.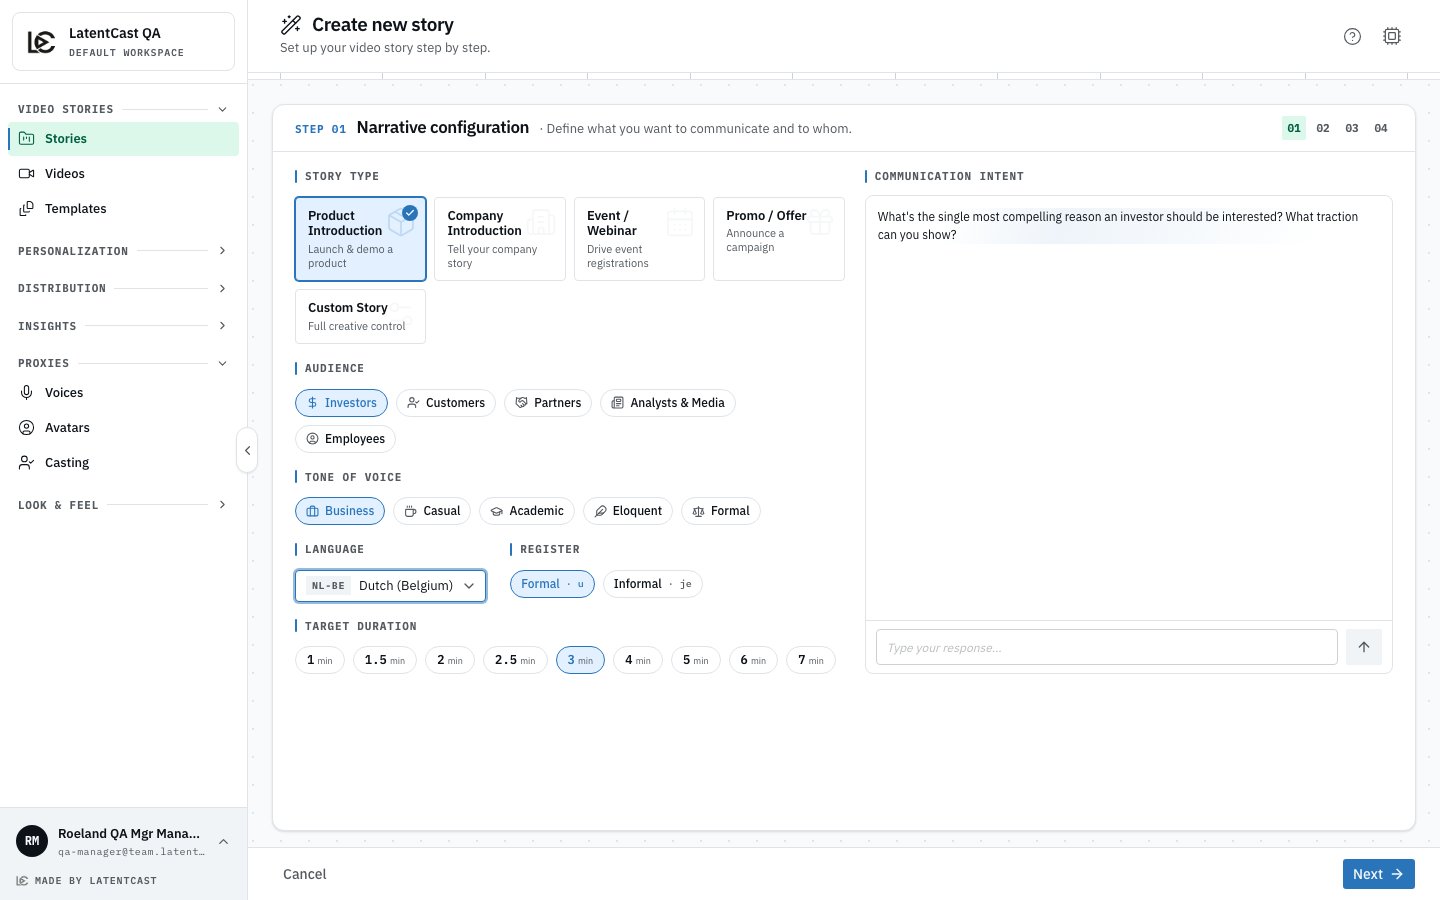
A Dutch story: picking the language adds the register, and the video will say u rather than je.
Step 2 · Narrative content
Your material. Upload a product brochure, a slide deck, a report, or several. The system reads and analyses each file as soon as it arrives. Then it does something worth knowing about in advance: it checks that your material can actually support the video you asked for. If you ask for a customer-facing product introduction and upload an internal financial summary, it will tell you the two do not line up and stop, rather than writing a confident video out of thin air.This is a feature, not an obstacle. LatentCast only says things your material supports. If you
hit a refusal, the fix is usually one of two things: upload the document that actually covers what
you want to say, or change the intent to match what you uploaded.
Step 3 · Production style
How the video should look and feel. You pick a and a , and can add production notes for visual direction. Both are covered on Brand kits and styles. The presenter’s voice is not chosen here. A story speaks with the voice set for its language, and you can pin a specific one afterwards in the story’s settings.Step 4 · Summary and review
A recap of your choices. Create the story, and production starts.While your story is built
Building takes a few minutes. The story page shows the work moving through its stages: reading your material, writing the script, speaking it, choosing and generating the visuals, timing the on-screen text, then assembling and checking the result. The last stage is a self-check. The system compares what was produced against what was planned and repairs what it can. You do not have to do anything while this runs, and you can leave the page.Video backgrounds arrive late, on purpose. A scene that uses a moving background shows a
placeholder while the real clip renders, so the preview stays watchable. The clip swaps itself in
when it is ready. See Backgrounds.
Changing your mind later
You can reopen the wizard on an existing story. What happens next depends on what you change:- change the audience or the material, and the story is rebuilt more thoroughly, script included;
- change only the production style, and just the visuals are rebuilt.
Next
The parts of a story
What you are looking at when the preview plays.
Brand kits and styles
Your colours, fonts and logo, and how a story is paced.